7 Easy & Effective DIY Raised Garden Bed Plans
Are you ready to grow a thriving garden while enhancing your yard? In this article, I’ll share seven easy and effective DIY raised garden bed plans. These projects offer simple steps, useful materials, and tips that fit every space and skill level. Whether you have a small balcony or a large backyard, these plans will help you create a beautiful garden that flourishes. Let’s dig in and get started!
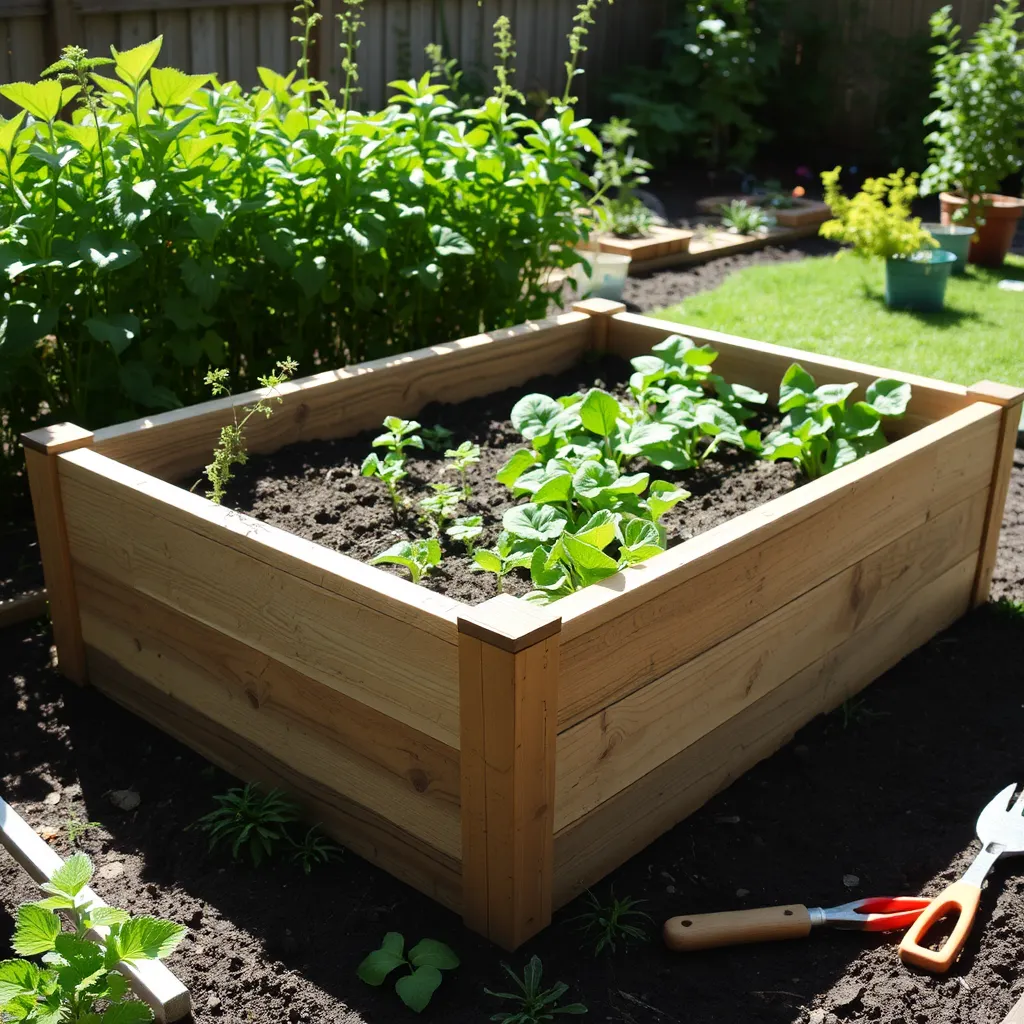
Plan 1: Basic Wooden Raised Garden Bed

For your first raised garden bed, you need a few key items.
Required materials:
– Untreated lumber
– Wood screws
– Drill
Step-by-step instructions with dimensions:
1. Cut the wood: Use four pieces of lumber. Make two 4-foot pieces and two 2-foot pieces.
2. Assemble the frame: Lay the 4-foot pieces parallel. Attach the 2-foot pieces to each end using wood screws.
3. Add support: For extra strength, add a center support. Cut a 2-foot piece. Screw it in the middle of the frame.
4. Choose dimensions: A height of 12 to 24 inches works well for most plants.
5. Place it: Move the frame to your chosen spot.
Tips for choosing the right location:
– Look for a sunny area. Most plants need at least six hours of sunlight each day.
– Ensure good drainage. Avoid low spots where water can collect.
– Consider access. Make sure you can easily reach all sides of the bed.
This simple design is great for beginners. You can grow many plants in it. Plus, it’s easy to build!
Plan 2: Pallet Raised Garden Bed

How to source and prepare wooden pallets
To start, find wooden pallets for free. Check local stores, warehouses, or online sites like Craigslist. Look for pallets that are clean and not broken. Avoid those with chemicals. Once you have your pallets, clean them by washing off dirt. Then, let them dry. If needed, sand any rough edges to keep splinters away.
Step-by-step assembly instructions
1. Gather your pallets: Use four pallets for each side.
2. Lay them out: Create a square or rectangle shape.
3. Secure the corners: Use screws or nails to fasten the pallets together.
4. Add a bottom: If you want, use a piece of plywood as a base.
5. Fill with soil: Add your soil mix, leaving some space at the top.
6. Plant your seeds: Choose your plants and start gardening!
Benefits of using pallets for sustainability
Using pallets is great for the Earth. They are often recycled, which cuts down on waste. This helps to save trees and reduces pollution. Plus, building with pallets is cost-effective. You can create a garden bed without spending much money. It’s a win-win for your garden and the planet!
Plan 3: Cinder Block Raised Garden Bed

For this plan, you will need:
– Cinder blocks
– Gravel
– Soil
How to Build
1. Choose a spot: Find a sunny area in your yard.
2. Lay gravel: Spread a layer of gravel where you want your bed. This helps with drainage.
3. Arrange blocks: Stack the cinder blocks in a square or rectangle. You can add layers for height.
4. Fill with soil: Pour soil into the center of the blocks. Make sure it is good garden soil.
5. Plant your seeds: Now you can plant your flowers or veggies!
Layout Ideas
– Single Layer: This is simple and easy to build.
– Double Layer: Stack blocks for a taller bed. This helps keep plants safe from pests.
Why Cinder Blocks?
Cinder blocks are great for drainage. They have holes that let water pass through. This keeps your plants from drowning. Plus, they are strong and last a long time. You can also use the holes to plant herbs or small flowers. This adds beauty and helps with space.
Using cinder blocks gives your garden a modern look. They are easy to find and cheap. This makes them a smart choice for any gardener.
Plan 4: Corner Raised Garden Bed

Advantages of corner beds for small spaces
I love corner raised garden beds. They fit well in tight spots. You can use corners in your yard or patio. This design makes the most of small areas. It also adds a nice touch to your garden. You can grow a variety of plants without needing a lot of space.
Step-by-step instructions for construction
1. Gather materials: You need untreated wood, screws, a drill, and a saw.
2. Measure your space: Aim for a size of 4 feet by 4 feet.
3. Cut your wood: Cut four pieces for the sides, each 4 feet long.
4. Assemble the frame: Use screws to connect the corners. Make sure it’s sturdy.
5. Add a bottom: If you want, add wood slats to the bottom for support.
6. Place in the corner: Position your bed in the desired corner.
7. Fill with soil: Use a mix of garden soil and compost for healthy plants.
Recommended planting arrangements for corner beds
For corner beds, I suggest planting taller plants in the back and shorter ones in the front. You can try tomatoes or peppers in the back. In the front, plant herbs or flowers. Mixing colors and heights makes it attractive. This layout also helps each plant get enough sunlight.
Plan 5: Tiered Raised Garden Bed

Overview of materials: levels of wood, support brackets
For a tiered raised garden bed, gather these materials:
– 2×6 or 2×8 untreated lumber
– Support brackets
– Wood screws
– A power drill
You will create at least three levels. The wood gives a sturdy feel. The brackets help hold the tiers in place.
Instructions for building each tier securely
1. Cut the wood: Measure and cut the wood to your desired height. Each tier can be 12 to 18 inches high.
2. Assemble the first tier: Use brackets at the corners for support. Secure with screws.
3. Add the next tier: Repeat the process. Make sure to stagger the boards for strength.
4. Secure all tiers: Check for stability. Tighten screws as needed.
Planting ideas for maximizing space and aesthetics
To make your garden look nice, choose plants by height. Plant tall flowers, like sunflowers, in the back. Place medium plants, like tomatoes, in the middle. Use herbs or small flowers in the front.
This layout helps you use space well. Each plant gets sunlight and air. Plus, your garden will look great!
Plan 6: Metal Raised Garden Bed

Metal raised garden beds offer a sleek look and great durability. You can use several types of metal for this project. Common options include:
– Galvanized steel
– Aluminum
– Cor-Ten steel
Step-by-Step Guide to Assembling the Frame
1. Choose your location. Find a sunny spot with good drainage.
2. Measure your metal sheets. Cut them to your desired size.
3. Create the base. Lay out the metal sheets in a rectangle or square.
4. Join the corners. Use metal brackets or screws to secure them.
5. Add support. Ensure the frame is sturdy by adding cross supports.
6. Fill with soil. Choose a mix of topsoil, compost, and organic matter.
7. Plant your seeds or plants. Space them well for growth.
Considerations for Metal vs. Wood in Gardening
Metal has some advantages over wood. It lasts longer and resists pests. However, metal can heat up quickly in the sun. This can affect plant roots. Wood is more natural and can blend into gardens better. It also can be easier to work with for beginners. Ultimately, choose the one that fits your garden style and needs.
Plan 7: Portable Raised Garden Bed on Wheels

For a portable raised garden bed, you need a few key materials:
– Wheels
– Plywood
– Frame
First, build a sturdy frame. Use the plywood for the base. Make sure it fits the frame tightly. Secure it with screws. The wheels go on each corner of the frame. This step is key.
Next, ensure the wheels can lock in place. This will keep your garden bed stable. You want it to stay put when you plant or water.
Now, think about the benefits of this design. You can move your garden bed easily. If seasons change, you can shift it to catch the sun. It also helps protect plants from frost by moving them inside.
A portable raised garden bed makes it easy to care for your plants. It’s fun to have the freedom to move your garden as needed. This plan offers a simple way to garden anywhere!
Additional Tips for Building Raised Garden Beds

Choosing the right soil mix for raised beds
The right soil mix is key for healthy plants. I recommend using a mix of topsoil, compost, and peat moss. This mix drains well and holds nutrients. Aim for a ratio of 40% topsoil, 40% compost, and 20% peat moss. You can also add perlite for better drainage. This mix helps roots grow strong and keeps plants happy.
Recommended tools for easy construction
Using the right tools makes building a raised bed simple. Gather these tools before you start:
– Tape measure
– Level
– Drill
– Saw
– Hammer
– Screwdriver
– Gardening gloves
These tools will help you cut, measure, and assemble your bed correctly. A level ensures your bed sits flat, which is crucial for water flow.
Common mistakes to avoid while building
Avoid these common mistakes to make your project easier:
– Skipping the location check: Always check for sunlight and drainage.
– Not leveling the ground: A level base prevents water pooling.
– Using treated wood: Treated wood can harm plants. Use untreated lumber instead.
– Ignoring depth: Make your bed at least 12 inches deep for roots to grow.
By steering clear of these errors, you’ll build a better raised garden bed.
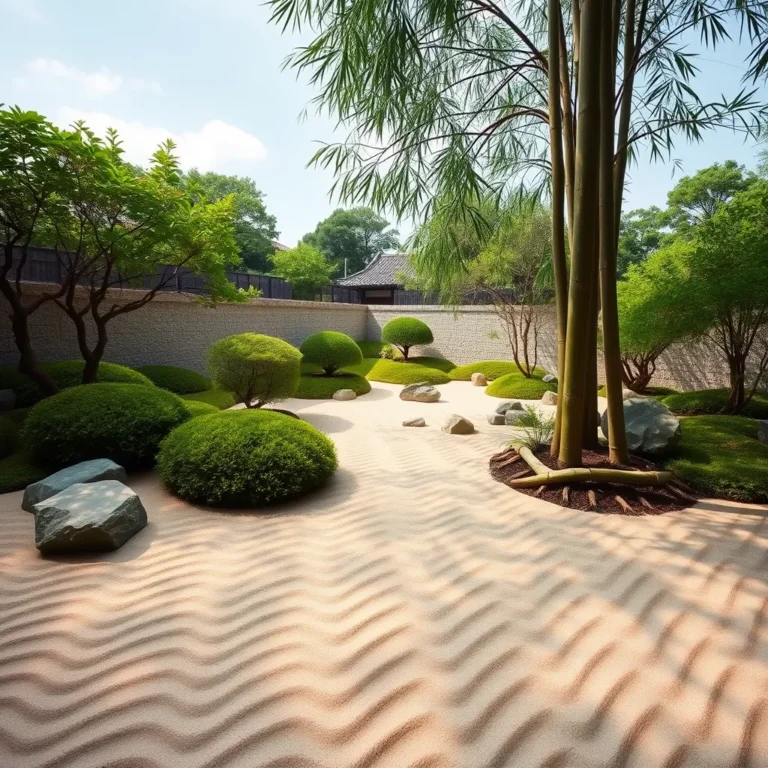
Visual Aids and Diagrams

Visuals make DIY plans easier to understand. They show you what to do step by step. A good image can help you see the final look of your garden bed. This way, you can picture your project in your yard.
For each plan, I found helpful images. You can see how the beds look when finished. These visuals guide you through the process. Here are some links to great resources:
– Basic Wooden Raised Garden Bed
– Pallet Raised Garden Bed
– Cinder Block Raised Garden Bed
– Corner Raised Garden Bed
– Tiered Raised Garden Bed
– Metal Raised Garden Bed
– Portable Raised Garden Bed on Wheels
You can find templates for layouts online, too. These give you ideas on how to arrange your beds. Some sites offer free downloads for plans. Just print them out and use them!
Using visuals in your projects makes everything clearer. They help you avoid mistakes and save time. Plus, they make building more fun!
FAQs about DIY Raised Garden Beds

Common concerns about building materials and their safety
Many people ask if the wood is safe for plants. Untreated wood is best. It does not have chemicals that harm plants. Some worry about using pressure-treated wood. This wood contains chemicals that may leach into the soil. If you want to be safe, stick with untreated lumber. Metal beds are safe too. Use food-grade metals to avoid rust and chemicals.
Tips for maintenance and care of raised garden beds
To keep your raised garden bed healthy, check for pests. Look under leaves and around soil. Water your plants regularly but don’t overdo it. Test the soil for moisture. Mulch helps keep the soil moist and controls weeds. Replace soil every year or two to keep it fresh and nutrient-rich.
Suggested plants that thrive in raised garden beds
Raised garden beds work great for many plants. Here are some top choices:
– Tomatoes: They love the warm soil and good drainage.
– Lettuce: It grows fast and enjoys the space.
– Carrots: They thrive in loose soil and grow deep.
– Peppers: They like the warm environment and plenty of sun.
– Herbs: Basil, parsley, and cilantro do well in raised beds.
These plants will give you a great harvest and make your garden beautiful.
Conclusion
You can create your own raised garden bed easily. We covered various plans, from basic wood to metal options. Each design has unique benefits, like space-saving corners or portability. Remember to choose the right materials and location for success.
In the end, gardening is fun and rewarding. Your raised garden bed can thrive with careful planning and care. Enjoy growing your plants and making your space more vibrant!